This How Tuesday I’m bringing you another upcycled wonder craft. Gotta love it!
While browsing through Barnes & Noble with my mom last Saturday (hi mom! Love you!), she came across a magazine with a really cool-looking wreath on the cover. She knew I’ve wanted a spring wreath for my front door, (yes, I know it’s technically winter, but in NorCal right now it definitely feels like spring) so she showed it to me. I, of course, thought “I can make that!” And for once I actually followed through.
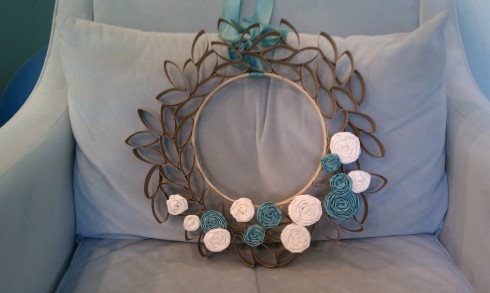
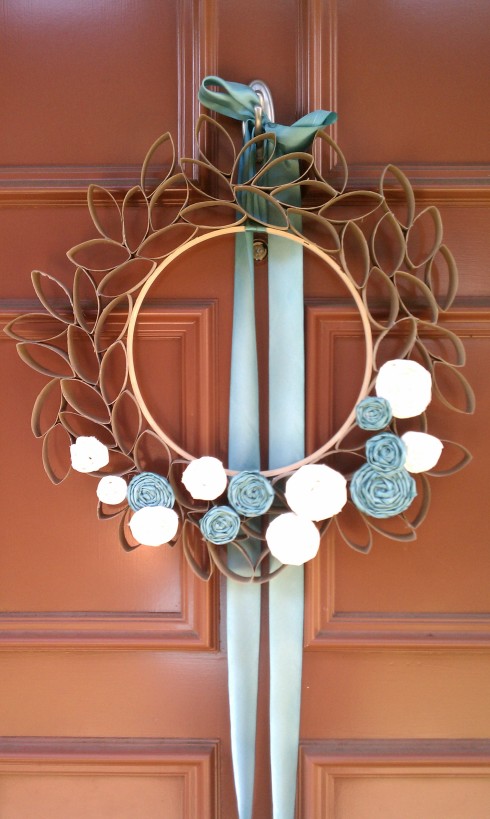
How cool-looking is that? Any guesses as to what it’s made out of? Wait for it….
Toilet paper rolls! Yes, really!! Thought it was wood, did you? So did I when I first saw it. A definitely thought it was wood at first, and thinks it looks like one of those little crowns of olive leaves that the ancient Greeks used to wear in the Olympics.
I didn’t buy the magazine, so I don’t remember the title, and they didn’t really do much by way of explaining how the wreath was made. But I could tell from looking at the front cover that this would be a super-simple project to make. And it was! As far as skill levels go, if you learned how to cut, paste, and be careful when playing with hot things in kindergarten you should be fine. So here’s how to make this stunning, simple, and super-inexpensive wreath. I think the original was made from paper towel rolls and strips of t-shirt. I used ribbons and fabric strips that I had on hand for mine, and I quite like the effect. All in all this cost me about three hours and a whopping $0.64 to make. I call that a win.
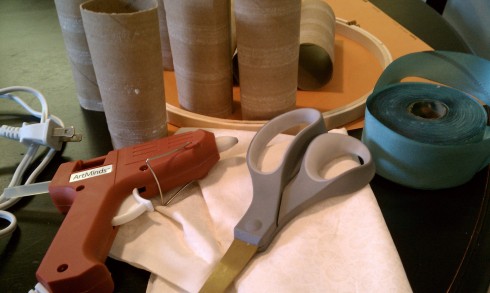
Materials needed:
- Rigid circular form (I used the inside of a 9” inch wooden embroidery hoop I got at JoAnne Fabrics for $0.64. The magazine wreath didn’t use one, but since this is a front door wreath I wanted mine to have some stability.)
- 18-ish empty toilet paper rolls, or half as many paper towel rolls. (This is really an arbitrary number, as you may need more or fewer depending on the diameter of your circular form, and depending on if you do three layers of ‘leaves’ as I did. For my 9” I used 18, if you go larger or smaller, or make fewer layers, your roll needs will increase or decrease accordingly.)
- Scissors
- Low-heat hot glue gun and lots of hot glue sticks
- Strips of fabric or ribbon (I give alternative materials for the flowers in the tutorial if you’re intimidated at the thought of making your own flowers.)
- Length of yarn or ribbon for hanging loop (optional)
Make Wreath:
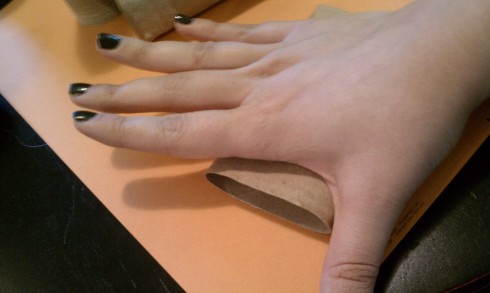
To make the paper ‘leaves,” start by flattening each paper roll with your hand.
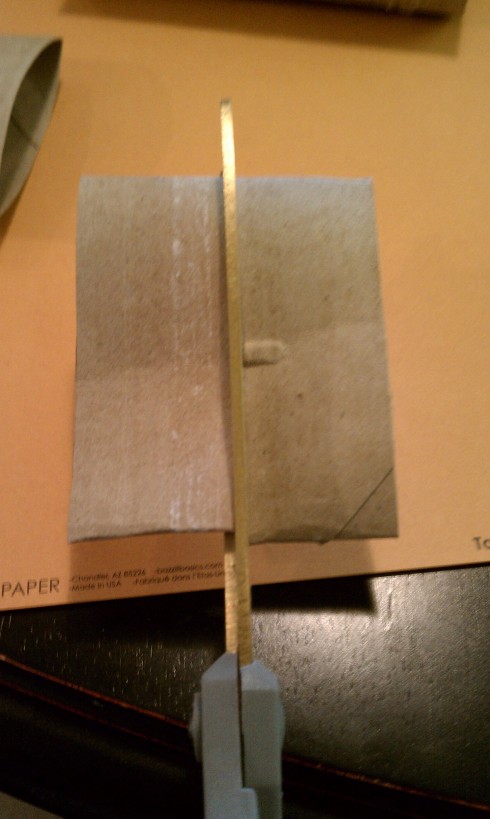
It should spring back a little, and form a leaf shape when viewed from an open end. Cut across the width of the tube. I cut each of my paper tubes into four equal pieces; if you’re using paper towel rolls, aim for pieces about one inch wide.
Once you’ve cut up all of your paper rolls, set three or four sections to the side. (they’re going to help us make flowers later, so set aside more if you want lots of flowers. For mine I used three 1-inch segments.) Lay out your circular form.
(Note: as I said, I used the inside of a wooden embroidery hoop. You can use anything circular and hollow though. I thought about using a wire hanger bent into a circle, and then I wouldn’t need to add a separate hanging loop! But apparently we don’t own wire hangers. If you use an alternate material you might want to wrap it with fabric or ribbon before starting this next step to help visually coordinate it, as the wooden hoop I used blended in nicely with the paper.)
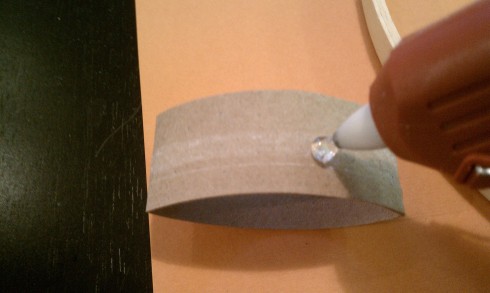
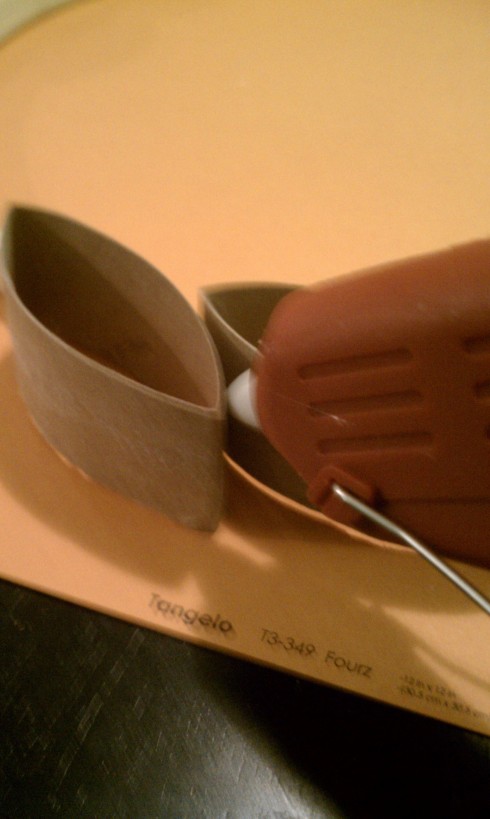
Take your hot glue gun and put a small lump of glue on one paper leaf, about 3/4 of the way down from one of the folded ends.
Quickly press glue onto the wooden form, keeping the leaf at an angle. Because my form was much thinner than my leaves, I kept it on the table and pressed my leaves flush with it, so that the back of my wreath is all one level, and from the front the leaves are twice as long as the wooden form. Helps it blend in that way.
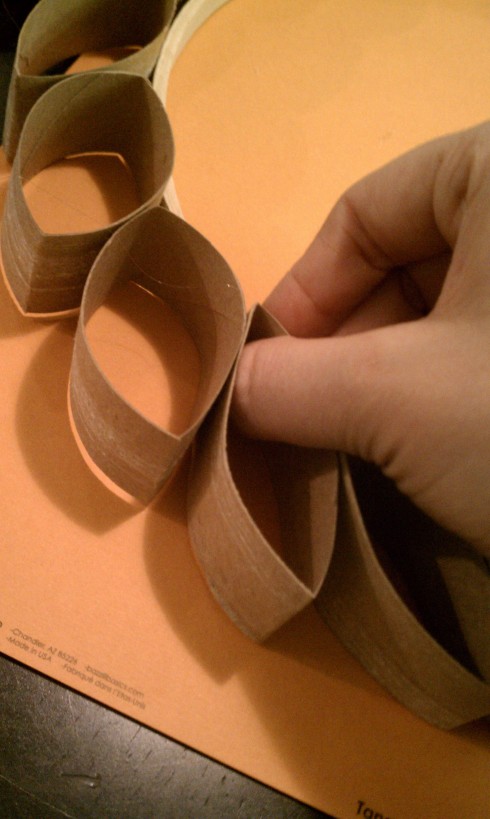
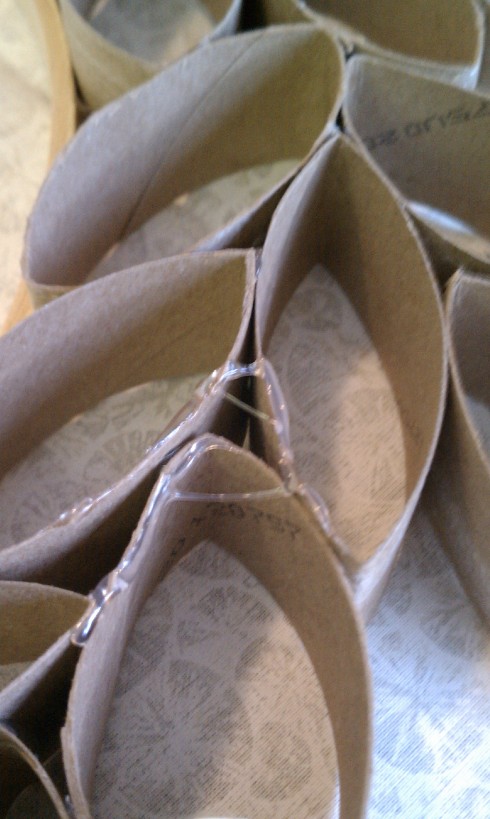
For the rest of the leaves on this layer you’ll be gluing in two places on each leaf: place one lump of glue as you did for the first leaf, ¾ of the way down, then flip your leaf over and put a stripe of glue directly opposite your glue lump. Or you can glue one leaf to another after the next leaf in in place, like so:
The second stripe is where each new leaf will connect with the leaf that came before it. Continue placing leaves around your form, layering each one in the gap left by the leaf that came before it. When you get to the last leaf, glue as you have been doing on each side of the leaf, and add a stripe of glue to the leaf you started with where the last leaf will overlap it. Slide the last leaf into place, keeping the continuity of the layering pattern intact.
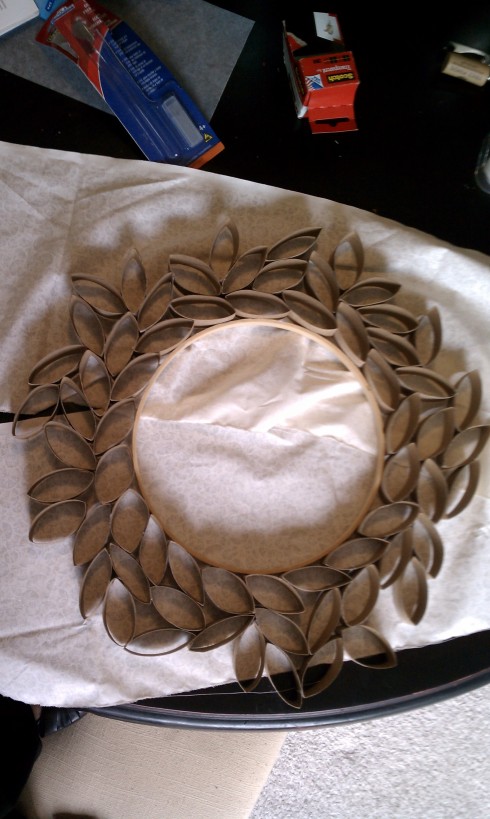
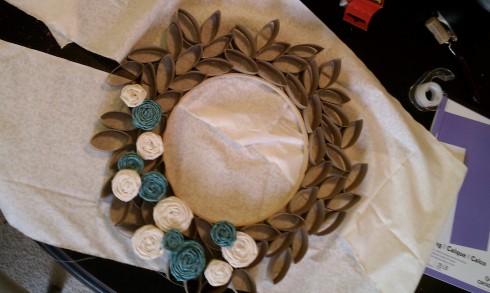
After that, where to place the leaves is up to you! You can continue in the same orderly layering, or let the leaves change directions and form peaks as I did. I recommend laying out your pattern before you start gluing the next layers to make sure you’re happy with the placement. You can lay them out one layer at a time and glue each one into place before adding the next layer, or lay them out all at once and take a picture for reference, like this:
No matter how you decide to place your leaves, you’ll want to build one layer at a time. I would put a leaf in place, see where it would touch neighboring leaves, then add glue to those places before sliding it into place. Keep adding leaves until you have your desired size wreath, or until you run out of leaves. (Don’t forget to keep three or four set aside for flowers!)
Make flowers:
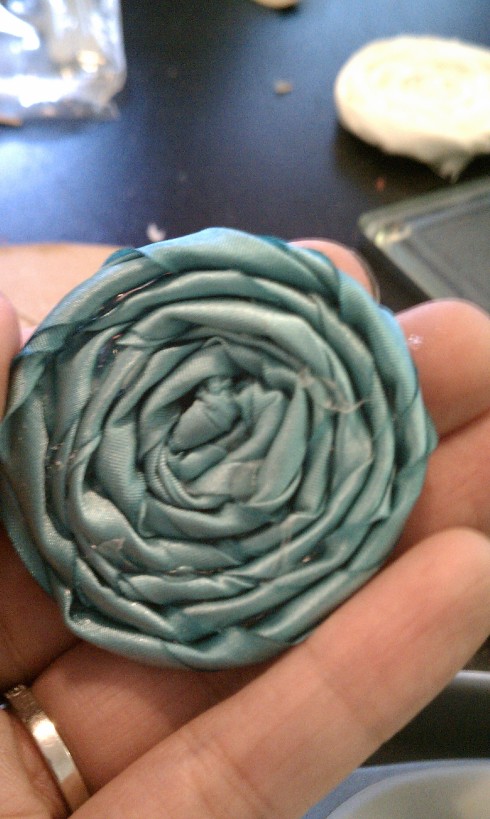
Note: making flowers is the most complicated part of this wreath, and definitely takes this wreath a little beyond first-grade cut and paste. If you don’t want to make your own flowers there are plenty of pretty ones you can find at a craft store. I also thought making some more of these beauties and using them would be amazing, (I may have to do another soon…) or draping some seasonal garland in and out through the leaves would also look great. If you want to make flowers, you can use any fabric you’d like. For mine I used some 1.5 inch teal silk ribbon I had on hand and some fabric left over from a Christmas project that I ripped into 1 inch strips. For our purposes I’ll be referring to whatever material you decide to use as ribbon.
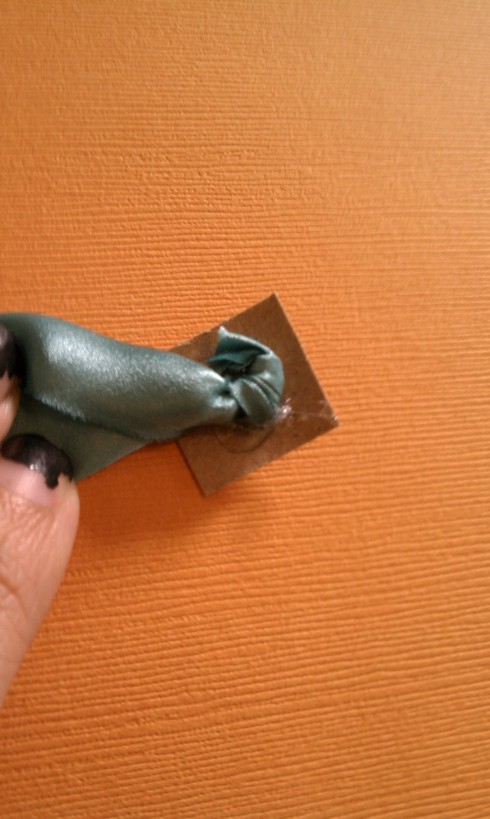
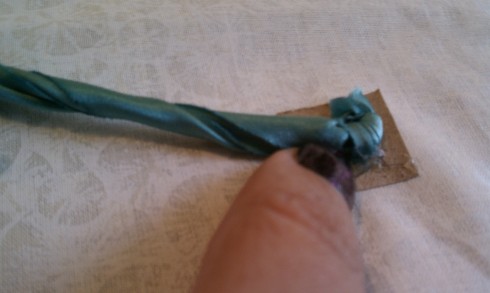
Take one of the reserved leaves and cut it into small squares, one for each flower. I made mind between 1/2 inches and 1 inch, since I wanted different sized flowers. Make a knot on one side of your ribbon, as close to the edge as possible. Put a dab of glue on your cardboard square and glue down your knot, tucking the loose end under.
Holding down your cardboard square, twist a few inches of your ribbon into a cord. Make the twist a little tighter than you want your flower to be, as it will untwist a bit as you form your flower.
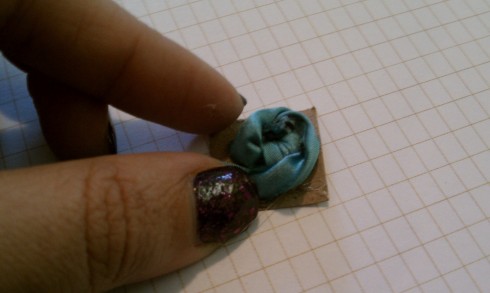
Draw a line of glue around the knot on your cardboard and coil the ribbon cord around the knot.
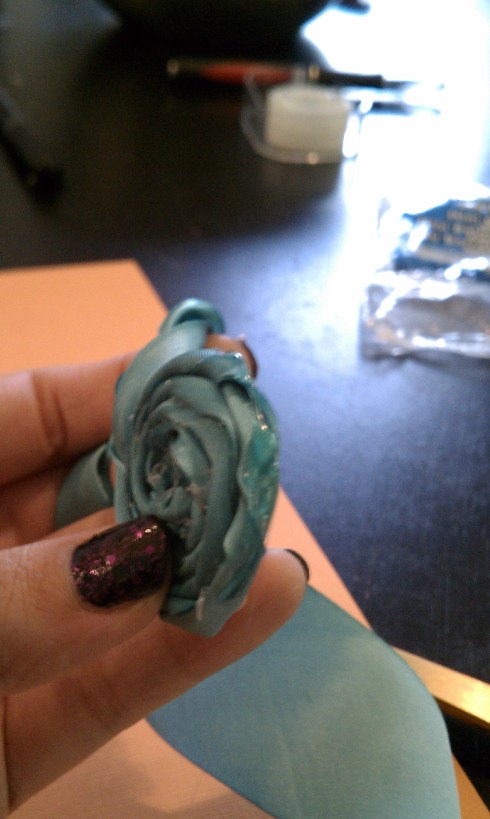
Continue to twist and glue in this manner, adding glue on the edge of the flower when you run out of cardboard to glue on. (Your flower should be larger than your cardboard so it’s not visible from the top.)
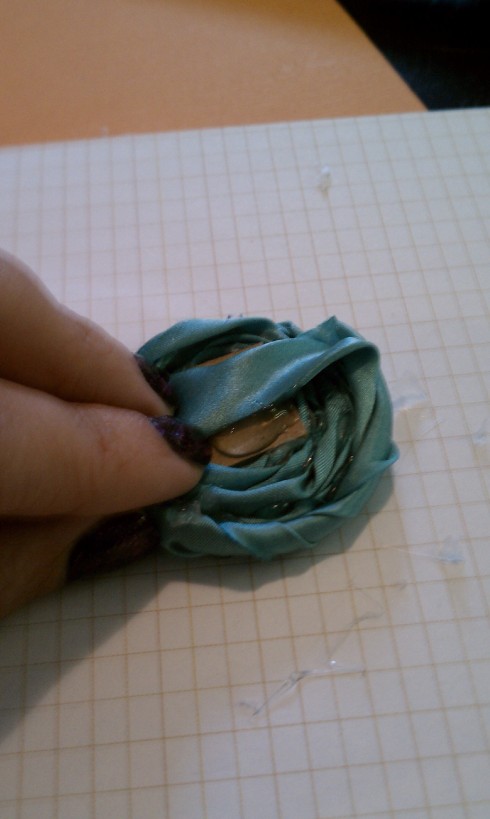
When you’re down to about an inch of ribbon, or have the flower as big as you’d like and cut the ribbon off, flip your flower over and glue the loose end flat to the back of the cardboard.
Et voila! A finished flower.
Make as many flowers as you’d like for your wreath, and get ready to glue them on. Start by laying out your flowers on the wreath until you get a design you’re happy with. If you have a camera take a photo for reference. So handy! If you don’t you can move your flowers onto the table while you work, trying to lay them out as close to the pattern you liked as possible. I went for something asymmetrical and layered some flowers on top of others to create clusters.
Work from one side of your design to the other. Lay your first flower on your wreath, then lift it up and look at the places on the cardboard leaves it will touch. Lay down a bead of glue on any points of contact.
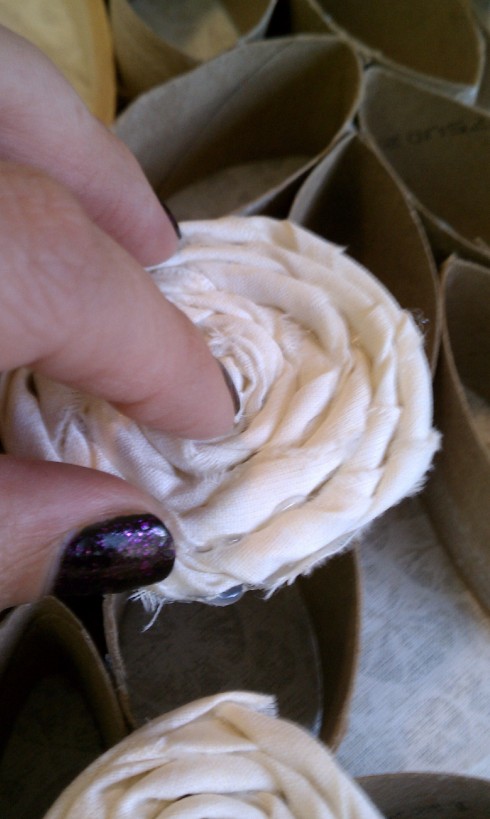
Lay your flower on the hot glue, securing it in place. You’ll have to work quickly! Yes, you can just cover the back of your flower in glue and splat it on, but that uses up a ton of glue, and this project already ate up most of a package of small hot glue sticks.
Continue gluing all of your flowers onto the wreath in your desired pattern, gluing at each point of contact to secure and holding in place until the glue sets. If you’re layering flowers on top of each other, glue the top flower directly to the flower beneath it.
Until you have your own version of this:
You can hang this directly on a peg using the inner loop as a hanger, or thread an extra length of ribbon through your wreath and tie a floppy bow as I’ve done. This is a lightweight wreath, good for outside use in nice weather (like we’re enjoying in California!) or indoors as a handcrafted, Anthropologie-esque decoration. I think this would look really nice hanging on a mounted coat rack in an entryway.
If you make one I’d love to see how it comes out. Happy hot gluing!



And your nails look fabulous…
A-thank you!
The glue gun is my best friend!
🙂 cool tutorial!
thelairweddings.wordpress.com/
AWESOME Tutorial! I love the colors and the idea is simply ingenious! Seriously?! TP rolls? I’m off to the fridge to down some prune juice. — totally kidding. Oh, and your rosettes are gorgeous! Very nice, my friend, verrrry nice 🙂
Just start spilling a lot of stuff… paper towel rolls go much further. 😉 Thanks!
this is brill! i will share with other crafty-peeps 🙂
Just cut and paste, baby, cut and paste…thanks!